Tag Archives: Leather seats

Job #3 Saab Convertible seats

Now, we’re moving to the big league!  Fancy seats with motors and heated bum sections. Dot will explain:

Our friend Donna wanted her Saab seats reupholstered and asked if I would like to have a go at it. I said I would give it a try and she said she wanted to do it in leather. I thought to myself ..leather..hmmm I have only made two sets of seats both using vinyl. How hard can it be, after all I have my trusted walking foot sewing machine. So I said should be easy after the long bench seats I did.

First you undo this screw

First you undo this screw

Well, Dave brought the seats home and I stared in horror at the mechanisms and wires. What have we gotten ourselves into!

Then undo this ine

Then undo this ine

Undo the elastic fastener for the seat back and remember where all the wires go

Undo the elastic fastener for the seat back and remember where all the wires go

Remember those wires

Remember those wires

The yllow plug placement was noteworthy and required its own picture (we have to put this back together!)

The yellow plug placement was noteworthy and required its own picture (we have to put this back together!)

This steel plate is held onto the seat chassis with 2 big bolts and 2 small screws. The seat top is held on by plastic rails.

This steel plate is held onto the seat chassis with 2 big bolts and 2 small screws. The seat top is held on by plastic rails.

The cover is held onto the bottom wire frame with hog rings that have to be cut away

The cover is held onto the bottom wire frame with hog rings that have to be cut away

Another hog ring

Another hog ring

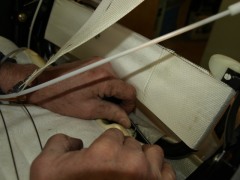
Wires in the seat covering that are fastened with the hog rings

Wires in the seat covering that are fastened with the hog rings

______The handbook calls the wire “listing”. I have to remember to sew these pieces of white nylon fabric. This is what attaches the cover to the foam. I will reuse these.

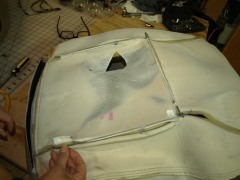
Rear cover opened - remember to put the grey piece back later.

Rear cover opened – remember to put the grey piece back later.

Unhook the bottom springs (2) from the seat back

Unhook the bottom springs (2) from the seat back

______You need brute strength to unhook the springs. I only cut and sew ..here’s hoping Dave can put these baby together later!

Remove this spring and the one on the opposite side.

Remove this spring and the one on the opposite side.

You don't have to remove the backing wire frame held by 4 springs (1 shown)

You don’t have to remove the backing wire frame held by 4 springs (1 shown)

Cut hog rings holding the rear wire frame to the cover wire frame

Cut hog rings holding the rear wire frame to the cover wire frame

You don't have to remove these 3 S clips, but underneath them ar 3 more hog rings going through the seat that have to be cut. These were extremely hard to get at- & even harder to re-install (these took ~ 10 mins out & 30 mins in)

You don’t have to remove these 3 S clips, but underneath them ar 3 more hog rings going through the seat that have to be cut. These were extremely hard to get at- & even harder to re-install (these took ~ 10 mins out & 30 mins in)

______Like I said, brute strength is a requirement in seat installations.

Padding comes off the seat frame

Padding comes off the seat frame

Naked seat frame

Naked seat frame

Final 3 hog rings to cut

Final 3 hog rings to cut

Seat bottom

Seat bottom

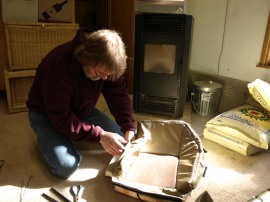
______Ahh, I guess I take over from here. The driver side seat cover is pretty much destroyed, so Dave had to dismantle the passenger side seat bottom so I could make an accurate template.

Taking apart the seat mechanisms took Dave two hours!

separated seat bottom

separated seat bottom

I unpicked the stitching from the old covers and traced the different sections onto paper, pressing the seams down while I traced.

nuts, bolts, springs etc that hold a seat together - did you remember where they all go?

nuts, bolts, springs etc that hold a seat together – did you remember where they all go?

Even so, later on Dave would ask me where is that “s”clip .We are missing one!

seat cushion

sea cushion

steel frame

steel frame

The foam is attached to the cover by the listing wire and hog rings and then placed on top of this metal frame. It is then screwed onto the chassis. The cover will then be wrapped around the metal frame edges by plastic retainers that required pushing and tugging and brute strength.

For the back hoe seats, the metal frame had a full metal back instead of a hole like this Saab one. It was a bear to hook the listing to the metal frame for the back hoe.

Seat chassis with motors, wires etc

Seat chassis with motors, wires etc

Seat back covering -inside out

Seat back covering -inside out

For the seat back, we only replaced the front part which is shown inside out. We kept the back covers because it looked in good condition – that part with the two holes for the headrest.

Foam seat back padding

Foam seat back padding

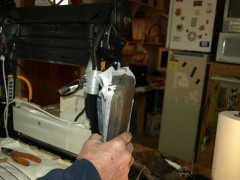
Seat back rear showing the fidly bits

Seat back rear showing the fidly bits

I'm not taking the second seat apart as I'll use it as a reference to re-assemble the first one

I’m not taking the second seat apart as I’ll use it as a reference to re-assemble the first one

Good idea to keep one as a sample.

Dot making the component templates

Dot making the component templates

Trace trace trace…as accurate as possible.

Marking out templates

Marking out templates

more templates

more templates

that was a big cow

that was a big cow

Hey, you calling me a big fat cow??!! I thought you loved me…just kidding.
Yes, holy cow, I have never seen such big hide before!

Small brown cow

Small brown cow

Marking out with template

Marking out with template

Foam padding stitched to leather being trimmed

Foam padding stitched to leather being trimmed

We decided not to spray glue the leather pieces onto the scrim (foam). We checked the old covers and they were just sewn around the edges and that’s what I did. I roughly cut the foam, sew close to the edges and then trim them.

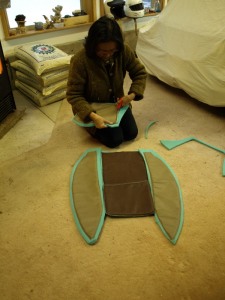
These 5 pieces will make a seat back

These 5 pieces will make a seat back

We suggested that it would look nice to have two tone leather seat covers.

Trimming

Trimming

Partially sewn seat back

Partially sewn seat back

last panel sewing

last panel sewing

Focus

Focus

Without this heavy duty walking foot sewing machine it would be impossible to sew double layer foam and leather pieces.

This foots walking

This foots walking

finishing off

finishing off

Foam side after stitching together

Foam side after stitching together

Sew the front to the back - not so easy

Sew the front to the back – not so easy

____After I attached the new front covers to the backing (old cover), I had to do a row of top stitching and that was pretty challenging.

Get is on that naked seat back

Get it on that naked seat back

Lots of tugging and grunting and pulling to put the covers back onto the seat back.

All dressed up.

All dressed up.

Putting in hog rings on the seatbottom

Putting in hog rings on the seatbottom

hog ringing

hog ringing

Checking the Metal frame positioning

Checking the Metal frame positioning

Loading a hog ring

Loading a hog ring

Hog ring that seat

Hog ring that seat

Squeezing in a hog ring

Squeezing in a hog ring

_________The plastic retainer that attached the cover to the edge of the metal frame is the dark piece near Dave’s hand. We saved this piece from the old covers.

Seat bottom covered

Seat bottom covered

And the front

And the front

Screw it back onto the frame

Screw it back onto the frame

Back & bottom come together

Back & bottom come together

Comfy chair

Comfy chair

Looking good

Looking good

Before and after

Before and after

_____________________________________

HOPE THE CUSTOMER IS HAPPY WITH HER SEATS!

OLYMPUS DIGITAL CAMERA

OLYMPUS DIGITAL CAMERA